Taming Bulky node_modules Directories

It is true, a Javascript developer’s HDD can often get mysteriously full. Maintaining a tidy and organized development environment is crucial for efficient coding and project management. As your projects evolve, and everytime you run npm install, dependencies accumulate, and it’s easy to end up with unused packages that clutter your project directory and inflate its size. This is where two solutions, namely a BASH command and the “npkill” package come to the rescue. I will try to elaborate on both of them here, BASH and npkill, and demonstrate how they can simplify the process of cleaning up unused Node.js packages.

While tools like npkill offer a user-friendly and interactive way to clean up unused Node.js packages, there’s also a powerful bash command that can help you achieve a similar goal directly from your command line. This approach is particularly useful if you prefer a quick and scriptable solution to remove all node_modules folders within your project’s directory and its subdirectories. Before we dive in, just a word of caution here: use this command carefully, as it involves removing data permanently from your system.

The Bash Command

To recursively remove all node_modules folders inside the current directory and its subdirectories, you can use the following bash command:

find . -name "node_modules" -type d -prune -exec rm -rf '{}' +

Here’s a breakdown of how the above line works:

  • find .: Initiates a search starting from the current directory (.) and its subdirectories.
  • -name "node_modules": Specifies the search for directories named node_modules.
  • -type d: Filters the search to include only directories.
  • -prune: Prevents find from entering matched directories, focusing only on the top-level node_modules folders.
  • -exec rm -rf '{}' +: Executes the rm -rf command on the matched node_modules directories. The {} is a placeholder for the matched directories, and the + at the end allows multiple directories to be passed to a single rm command.

Caution and Considerations

It is very important to exercise caution when using commands that involve data deletion, like rm -rf. Before executing the command, make sure you are in the correct directory and that you fully understand the potential consequences. This method can help you free up disk space by removing unused dependencies, but it’s of course always recommended to have a backup of your project or important data before performing such actions.

Choosing the Right Approach

Both the npkill package and the bash command provide effective ways to clean up your projects. The choice between them depends on your preference for an interactive tool or a quick scriptable solution. Whichever approach you choose, maintaining a tidy and organized project directory will contribute to a more efficient and productive development workflow.

In what comes next, I will touch upon the features and benefits of using the npkill package to streamline your Node.js project cleanup process.

What is npkill?
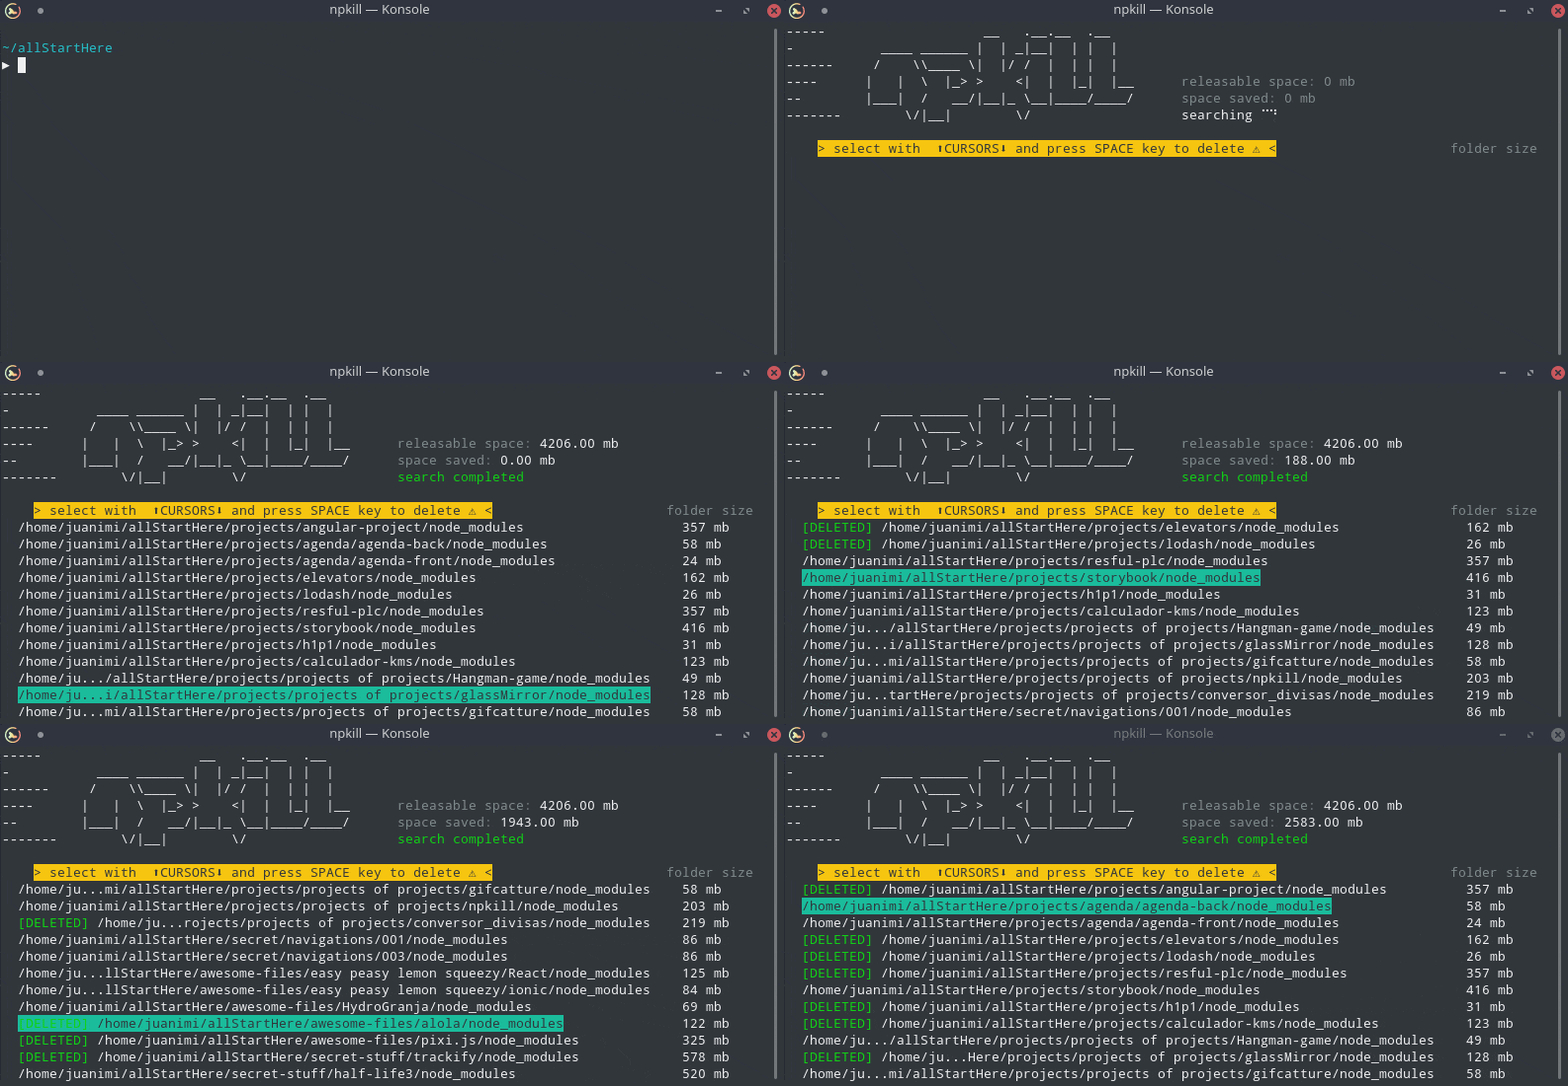
npkill is a handy command-line tool designed specifically for Node.js developers to help them identify and remove unused packages from their projects. It provides a simple and efficient way to free up valuable disk space and streamline your development environment. With just a few commands, you can regain control over your project’s dependencies and maintain a leaner, more manageable codebase.

Key Features:

  1. Interactive Interface: Npkill offers an interactive and intuitive user interface that lists all the packages in your project directory, along with their sizes. This visual representation helps you make informed decisions about which packages to remove.
  2. Size Insights: Apart from listing the packages, npkill also displays the size of each package, allowing you to identify large or unnecessary dependencies that might be contributing to bloat.
  3. Sorting Options: You can sort the package list by size or name, making it easier to identify the most significant contributors to your project’s size.
  4. Simple Removal: Once you’ve identified the packages you want to remove, npkill makes the removal process as simple as typing a single command. You can remove individual packages or multiple packages at once.

Getting Started with npkill:

Using npkill is straightforward. Here’s a quick guide to getting started:

  1. Install npkill globally using npm:
   npm install -g npkill
  1. Navigate to your project directory in the terminal.
  2. Run npkill:
   npkill

Alternatively, you could use npx to run it more swiftly: npx npkill

  1. Follow the on-screen prompts to select and remove the packages you no longer need.

Managing your project’s dependencies is a vital aspect of maintaining a healthy and efficient codebase. The npkill package simplifies this process by providing an interactive interface to identify and remove unused packages, helping you keep your project directory clean and organized. By incorporating npkill into your workflow, you can streamline your development environment, improve project maintainability, and free up valuable disk space.

Share
Taming Bulky node_modules Directories

TIL: Using React Testing Library in Vite via Vitest

Vite is a robust tool for rapidly creating React projects. However, unlike Create React App (CRA), Vite does not come with built-in support for React Testing Library (RTL). Let us walk through the process of setting up RTL in a Vite React project using Vitest, a testing solution designed specifically for Vite. By following these steps, you’ll be able to easily write and execute tests for your Vite React applications.

Step 1: Creating a Vite React Project

Let’s begin by creating a new Vite React project. Open your terminal and run the following command:

npm create vite@latest my-vite-app --template react

Step 2: Installing Dependencies

Next, we need to install the necessary dependencies for RTL and Vitest. In your project directory, run the following command:

npm install --save-dev @testing-library/jest-dom @testing-library/react @testing-library/react-hooks @testing-library/user-event jsdom vitest

Step 3: Setting up Vitest

3.1 Create a new file called setupTests.js at the root of your project and add the following import statement:

import "@testing-library/jest-dom"

3.2 Create another file called test-utils.js at the root of your project and include the following code:

/* eslint-disable import/export */

import { render } from "@testing-library/react";

const customRender = (ui, options = {}) =>
  render(ui, {
    wrapper: ({ children }) => children,
    ...options,
  });

export * from "@testing-library/react";
export { default as userEvent } from "@testing-library/user-event";
export { customRender as render };

3.3 Open vite.config.js and add the following code:

export default defineConfig({
  // ...
  test: {
    globals: true,
    environment: 'jsdom',
    setupFiles: './setupTests.js',
  },
})

Step 4: Modifying package.json

Update the scripts section in your package.json file with the following scripts:

"scripts": {
  // ...
  "test": "vitest",
  "coverage": "vitest run --coverage"
}

Step 5: Writing Tests

Now you can start writing tests using RTL in your Vite React project. Here’s an example of a test file named App.test.jsx:

import { describe, expect, it } from "vitest";
import App from "./App";
import { render, screen, userEvent } from "../test-utils";

describe("Sample tests", () => {
  it("should render the title correctly", () => {
    render(<App />);
    const title = screen.getByText(/Welcome to My App/i);
    expect(title).toBeInTheDocument();
  });

  it("should increment count on button click", async () => {
    render(<App />);
    const button = screen.getByRole("button");
    userEvent.click(button);
    const count = await screen.findByText(/Count: 1/i);
    expect(count).toBeInTheDocument();
  });
});

Step 6: Running Tests

To run your tests, execute the following command in your terminal:

npm run test

This is how to set up React Testing Library (RTL) in Vite React projects using Vitest. By following these steps, you can seamlessly integrate testing into your Vite React applications. RTL’s user-friendly API combined with the power of Vit.

Share
TIL: Using React Testing Library in Vite via Vitest

JavaScript Objects Cheatsheet

As a follow-up to my previous post on Factory vs Constructor Functions in JavaScript, below is a collection of useful examples that aim to illustrate Objects and their related functionalities.

// Obj literal syntax
const person = { name: 'Behnam', age: 37 };

// Constructor function
function Person(name, age) {
	this.name = name;
	this.age = age;
}
const behnam = new Person('Behnam', 37);

// Class syntax (ES6+)
class Animal {
	constructor(name) {
		this.name = name;
	}
}
const bear = new Animal('Bumzy');

Accessing Object Properties

// Dot notation
console.log(person.name); // Behnam

// Bracket notation
console.log(person['age']); // 37

Modifying Object Properties

person.age = 30; // Changing existing property
person.city = "Stockholm"; // Adding new property
delete person.name; // Deleting a property

Checking if Property Exists

if ('name' in person) {
	console.log("Name exists!");
}

Looping through Obj properties

for (const key in person) {
	console.log(`${key}: ${person[key]}`);
}
// name: Behnam, age: 37

// Object.keys (ES5+)
Object.keys(person).forEach((key) => {
	console.log(`${key}: ${person[key]}`)
});
// name: Behnam, age: 37

Object Methods

const calculator = {
	add: function(a, b) {
		return a + b;
	},
	subtract(a, b) {
		return a - b;
	}
};
console.log(calculator.add(5, 3)); // 8
console.log(cakcykatir.subtract(7, 2)); // 5

Object Serialization

The snippet below first converts the person object into a JSON string using JSON.stringify(). It then parses the JSON string back into a JavaScript object using JSON.parse(). This helps transferring data between different systems.

const json = JSON.stringify(person);
console.log(json); // {"age":37,"name": Behnam}

const obj = JSON.parse(json);
console.log(obj.age); // 37

Inheritance

We’ll create a basic inheritance example involving Person and Student objects.

// Parent object constructor
function Person(name, age) {
  this.name = name;
  this.age = age;
}

// Adding a shared method to the Person prototype
Person.prototype.sayHello = function () {
  console.log(`Hello, my name is ${this.name} and I am ${this.age} years old.`);
};

// Child object constructor inheriting from Person
function Student(name, age, grade) {
  // Call the Person constructor to set name and age
  Person.call(this, name, age);
  this.grade = grade;
}

// Set up the prototype chain for inheritance
Student.prototype = Object.create(Person.prototype);
Student.prototype.constructor = Student;

// Add a unique method to the Student prototype
Student.prototype.study = function () {
  console.log(`${this.name} is studying in grade ${this.grade}.`);
};

// Create instances of Person and Student
const person = new Person('Alice', 30);
const student = new Student('Bob', 18, 12);

// Use the inherited and unique methods
person.sayHello();
student.sayHello();
student.study();

In this example:

  1. We have a Person constructor function that defines two properties (name and age) and a shared method sayHello().
  2. We then create a Student constructor function that inherits from Person. It calls Person.call(this, name, age) to set the shared properties and uses Object.create(Person.prototype) to set up the prototype chain for inheritance.
  3. The Student constructor adds its unique method study() to its prototype.
  4. We create instances of both Person and Student, and then call their methods to demonstrate inheritance. The Student object inherits the sayHello() method from the Person prototype and has its own study() method.
Share
JavaScript Objects Cheatsheet

TIL: Achieve instant boost by implementing an Enhanced Lazy Loading

Lazy loading is a technique employed to enhance website performance by deferring the loading of images until they are necessary and in viewport. In other words, rather than loading all images simultaneously, lazy loading postpones their loading until they are about to be displayed in the visible area of the webpage or when the user scrolls to them. This technique decreases the initial load time of the page and reduces data consumption, leading to quicker and more effective browsing experiences.

In practice, implementing lazy loading for images is a straightforward process accomplished by adding a solitary attribute to your image tag. By setting the loading attribute to “lazy,” you activate the lazy loading functionality for the image. The browser will then autonomously decide the appropriate timing to download the image, considering its proximity to the visible area of the screen. The primary drawback of this simple lazy loading technique is that the user will encounter an empty space in place of the image until it finishes downloading.

<img src="image.jpg" loading="lazy" />

An Enhanced approach

To implement advanced lazy loading, we can generate a small, blurry placeholder image using a tool like ffmpeg. By setting this placeholder image as the background of a <div> element, we create a visual placeholder for the full image. To ensure a smooth transition, we can hide the actual <img> element by default within the <div>.

To create a placeholder image using ffmpeg, run the following command in the command line:

ffmpeg -i testImg.jpg -vf scale=30:-1 testImg-sm.jpg

This generates a small image that is 30 pixels wide, while maintaining the aspect ratio. The next step is to create the HTML structure with the blurred image as the background of the <div>, and the full image hidden within it:

<div class="blurred-img">
  <img src="testImg.jpg" loading="lazy" />
</div>

To enhance the effect, you can add a CSS filter property to the <div> to increase the blur:

.blurred-img {
  filter: blur(10px);
}

What is more, you can add a pulsing effect to the placeholder image to indicate loading:

.blurred-img::before {
  content: "";
  position: absolute;
  inset: 0;
  opacity: 0;
  background-color: white;
  animation: pulse 3.2s infinite;
}

@keyframes pulse {
  0% {
    opacity: 0;
  }
  50% {
    opacity: 0.1;
  }
  100% {
    opacity: 0;
  }
}

To fade in the full image once it is loaded, you can add JavaScript code that listens for the image load event and applies a “loaded” class to the <div>:

const blurredImageDiv = document.querySelector(".blurred-img")
const img = blurredImageDiv.querySelector("img")

function loaded() {
  blurredImageDiv.classList.add("loaded")
}

if (img.complete) {
  loaded()
} else {
  img.addEventListener("load", loaded)
}

Finally, update the CSS to include transitions and reveal the full image when the “loaded” class is added:

.blurred-img.loaded::before {
  animation: none;
  content: none;
}

.blurred-img img {
  opacity: 0;
  transition: opacity 250ms ease-in-out;
}

.blurred-img.loaded img {
  opacity: 1;
}

With these implementations, the webpage will display a small, blurred placeholder image until the full image is loaded. The full image will then fade in smoothly, enhancing the user experience.

Share
TIL: Achieve instant boost by implementing an Enhanced Lazy Loading

Sluggish apps on M1 Macs

It has been quite a while since M1 was introduced in the second half of 2020. Still, some apps like Skype and WhatsApp are not optimized for the Apple Silicon; thus, they run very sluggishly, bringing about a not-so-pleasant user experience overall.

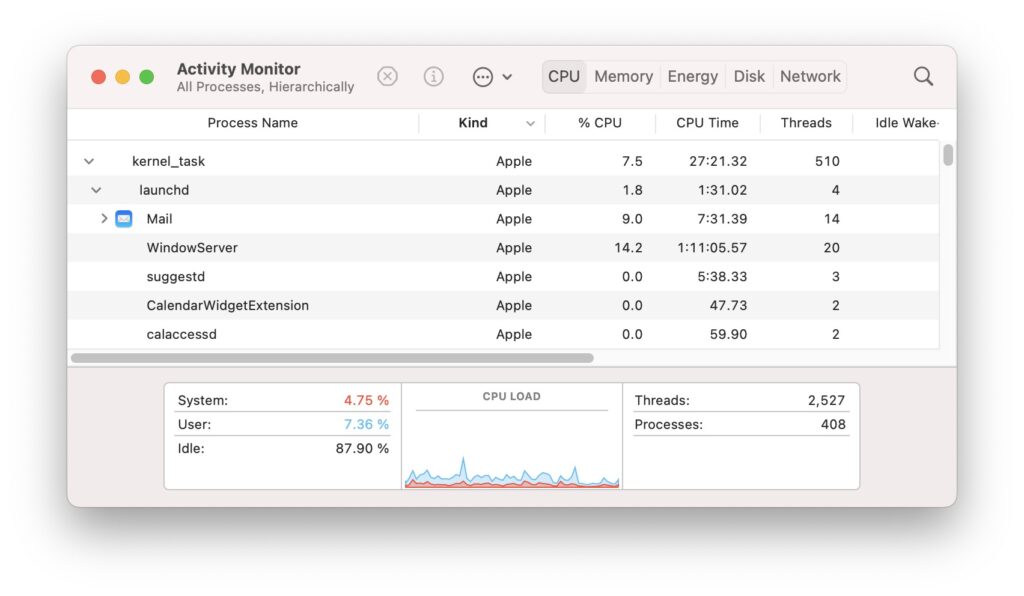
Inspecting the Activity Monitor app, you can quickly check whether a Mac app runs on Rosetta or M1.

  • Launch Activity Monitor
  • Choose the CPU section in the top bar.
  • Once it loads up, you’ll see a column named “Kind.” If the app says “Intel,” you should download the native version, if available.

Likewise, if you go over to Is Apple Silicon Ready, you can check whether or not the app at issue is optimized for your M1 Processor.

Also related to this is the strange case of the “M1 Mac SSD Swap Memory Issue,” which was discussed in detail by Created Tech. Hypothetically, excessive use of Swap Memory has raised potential concerns about SSD longevity.

So the solution I hit upon was to use the web app alternatives. They run much smoother since the browser is already running natively on Apple’s M1 chip and reside in the background most of the time.

If you use Chromium-Based Browsers (like Chrome, Brave, and Vivaldi), You can take this a step further by creating a shortcut via the menu > More Tools > Create Shortcut and have the app icon in your dock.

Share
Sluggish apps on M1 Macs

iTerm: Open a new tab in the current working directory

If you are using Terminator on Linux, one of the nice features it comes with is starting a new tab in the current directory (pwd) you were in. On MacOS, using iTerm the same thing is achievable via selecting Duplicate Tab from the Shell menu, and sadly, there is no shortcut defined by default.

It was something I simply put up with for a long time and today I just realized it has to be fixed. Here’s how you could do it:

iTerm
iTerm > Preferences

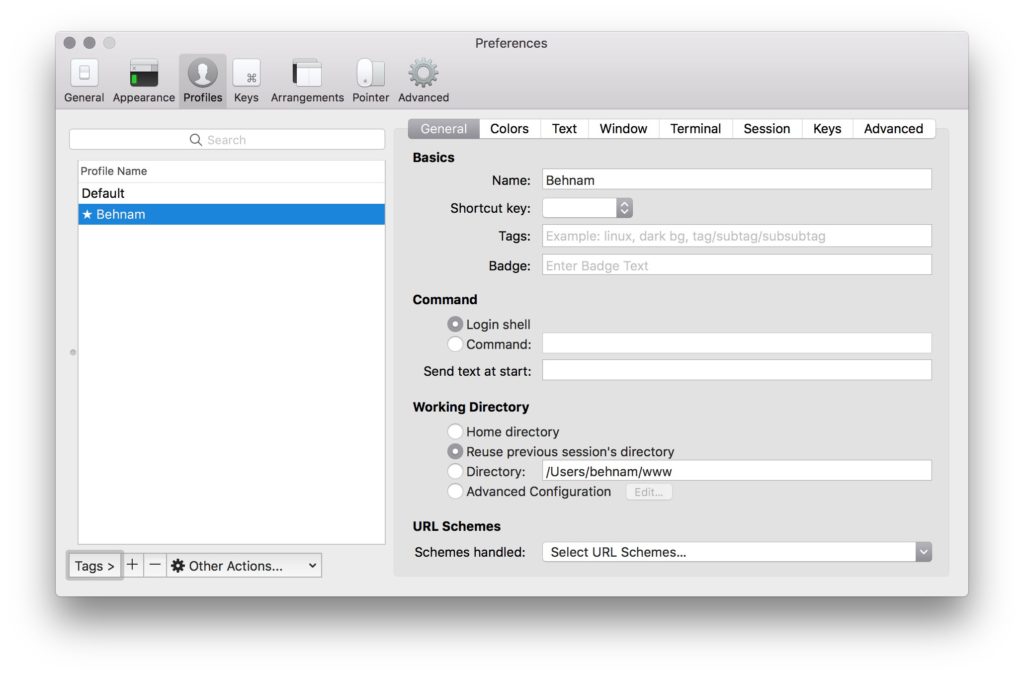
Head over to Preferences > Profiles > General > Working Directory and change it to “Reuse previous session’s directory”.
Share
iTerm: Open a new tab in the current working directory